Sea World Tiles
After hanging out you with my friends from Oregon to the SeaWorld in San Diego, CA I decided that it is might be cool to develop a simple Android application which keeps our memory about the adventure parks.
Code: surfsnippets/shamu

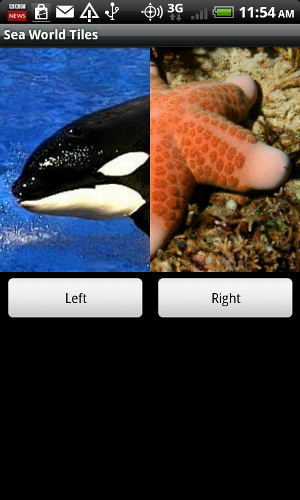
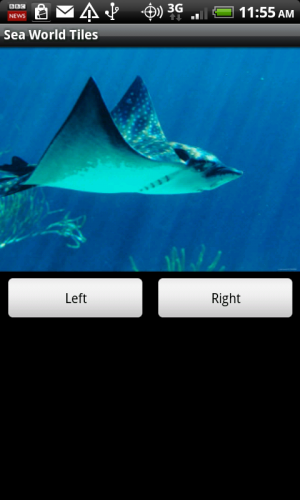
So here is the app called Sea World Tiles. Feel free to download it from Android Market and play around. In this app you need to compose the picture of a sea creature from left and right sides by clicking the appropriate buttons.
The source code is available in the repository surfsnippets in directory shamu. Here is the short description of source code to show how simple it is to write Android applications.
The layout in Android applications is described in .xml file, main.xml and includes TableLayout with two TableRow. The upper TableRow displays two tiles of ImageView and the bottom TableRow keeps left and right buttons:
1
2
3
4
5
6
7
8
9
10
11
12
13
14
15
16
17
18
19
20
21
22
23
24
25
26
27
28
29
30
31
32
33
<?xml version="1.0" encoding="utf-8"?>
<LinearLayout xmlns:android="http://schemas.android.com/apk/res/android"
   android:layout_width="fill_parent"
   android:layout_height="fill_parent"
   android:orientation="vertical"
   android:id="@+id/main_layout">
    <TableLayout android:id="@+id/tableLayout1" android:layout_width="match_parent" android:layout_height="wrap_content">
        <TableRow android:id="@+id/tableRow1" android:layout_width="wrap_content" android:layout_height="wrap_content">
            <ImageView android:layout_width="wrap_content"
                       android:layout_height="wrap_content"
                       android:src="@drawable/seaworld_l"
                       android:id="@+id/picture_l"></ImageView>
            <ImageView android:layout_width="wrap_content"
                       android:layout_height="wrap_content"
                       android:src="@drawable/seaworld_r"
                       android:id="@+id/picture_r"></ImageView>
        </TableRow>
        <TableRow android:id="@+id/tableRow2" android:layout_width="wrap_content" android:layout_height="wrap_content">
            <Button android:text="Left"
                    android:id="@+id/button_left"
                    android:layout_width="wrap_content"
                    android:layout_height="wrap_content"
                    android:layout_weight="0.5"
                    android:layout_margin="5dip"></Button>
            <Button android:text="Right"
                    android:id="@+id/button_right"
                    android:layout_width="wrap_content"
                    android:layout_height="wrap_content"
                    android:layout_weight="0.5"
                    android:layout_margin="5dip"></Button>
        </TableRow>
    </TableLayout>
</LinearLayout>
Layout specifies some important parameters such as widget id: @android:id="+id/button_left", sizes: android:layout_weight="0.5" or relation to container widget: android:layout_margin="5dip". Some of these parameters can be used in program.
The program is consists of just one Shamu.java:
1
2
3
4
5
6
7
8
9
10
11
12
13
14
15
16
17
18
19
20
21
22
23
24
25
26
27
28
29
30
31
32
33
34
35
36
37
38
39
40
41
42
43
44
45
46
47
48
49
50
51
52
53
54
55
56
57
58
59
60
61
62
63
64
65
66
67
68
69
70
71
72
73
74
75
76
77
78
79
80
81
82
83
84
85
86
87
88
89
90
91
92
93
94
95
96
package com.surfingbits.shamu;

import java.util.HashMap;

import android.app.Activity;
import android.os.Bundle;
import android.view.View;
import android.widget.Button;
import android.widget.ImageView;

import java.util.Random;

public class Shamu extends Activity {
    /** Called when the activity is first created. */

    HashMap<Integer, String> num2pic;
    private static Random randNum;
    public static int randl, randr;

    @Override
    public void onCreate(Bundle savedInstanceState) {
        super.onCreate(savedInstanceState);
        setContentView(R.layout.main);

        initValues();

        Button btnLeft = (Button) findViewById(R.id.button_left);  // Left button
        btnLeft.setOnClickListener(new Button.OnClickListener() {
            public void onClick(View v) {
                Shamu.this.replaceImage("l");
            }
        });
        Button btnRight = (Button) findViewById(R.id.button_right); // Right button
        btnRight.setOnClickListener(new Button.OnClickListener() {
            public void onClick(View v) {
                Shamu.this.replaceImage("r");
            }
        });
    }

    public void initValues()
    {
        randNum = new Random();
        randl   = 0;
        randr   = 0;
        num2pic = new HashMap<Integer, String>();
        num2pic.put(new Integer(0), "shamu");
        num2pic.put(new Integer(1), "dolphin");
        num2pic.put(new Integer(2), "seastar");
        num2pic.put(new Integer(3), "rayfish");
    }

    public int getRandNum(String side)
    {
        // Two static variables randl and randr are set by corresponding button
        try {
            int temp    = Shamu.class.getField("rand"+side).getInt(null);   // randr or randl
            int tempB   = temp;
            while (tempB == temp)
            {   // try until you get different int
                temp    = randNum.nextInt(num2pic.size());
            }
            Shamu.class.getField("rand"+side).setInt(Shamu.class, temp);
            return temp;
        } catch (NoSuchFieldException e) {
            return 0;
        } catch (SecurityException e) {
            return 0;
        } catch (IllegalAccessException e) {
            return 0;
        }
    }

    public int layoutId(String base, Class cls, String side)
    {
        // Trying to use reflection getField (similar to Python getattr) to get field value
        int id;
        // Check if side is "l" or "r"
        try {
            id  = cls.getField(base+"_"+side).getInt(null); // Example: R.id.picture_l
        } catch (NoSuchFieldException e) {
            id = 0;
        } catch (SecurityException e) {
            id = 0;
        } catch (IllegalAccessException e) {
            id = 0;
        }
        return id;
    }

    public void replaceImage(String side)
    {
        ImageView pic   = (ImageView) findViewById(layoutId("picture", R.id.class, side));
        pic.setImageResource(layoutId(num2pic.get(getRandNum(side)), R.drawable.class, side));
    }
}
When Android application is started the onCreate() method is called.
First, it loads the main layout:
setContentView(R.layout.main);initializes attributes and and then creates button widget specified by id R.id.button_left and defines the OnClickListener():
1
2
3
4
5
6
Button btnLeft = (Button) findViewById(R.id.button_left);  // Left button
btnLeft.setOnClickListener(new Button.OnClickListener() {
    public void onClick(View v) {
        Shamu.this.replaceImage("l");
    }
});
When the user clicks the button replaceImage() method will be called:
1
2
3
4
5
public void replaceImage(String side)
{
   ImageView pic    = (ImageView) findViewById(layoutId("picture", R.id.class, side));
   pic.setImageResource(layoutId(num2pic.get(getRandNum(side)), R.drawable.class, side));
}
This method takes the ImageView by id and replaces it with another image by randomly generating number and looking up the appropriate id in the HashMap for the next picture.
To make the source code more compact I used Java Reflection: Reflection (computer programming) that can refer to class attributes or methods by name string. This approach is similar to Python functions getattr() or setattr().


